Why Reheating Crab is Important
Reheating crab is important for a variety of reasons. First and foremost, it helps preserve the flavor and texture of the crab. Whether you have leftover crab from a previous meal or bought cooked crab that needs to be reheated, properly reheating it ensures that you can enjoy the same delicious taste and tender texture as when it was first cooked.
Additionally, reheating crab is a great way to reduce food waste. Instead of letting the crab go to waste or throwing it away, reheating allows you to make use of leftovers and get the most out of your food. This not only saves money but also helps in minimizing your environmental impact.
Reheating crab also saves time and effort in meal preparation. Rather than having to start from scratch and cook the crab all over again, reheating allows you to have a quick and convenient meal ready in no time. This is especially beneficial for busy individuals or those who are looking for a hassle-free meal option.
Furthermore, reheating crab opens up a world of possibilities for versatile meal planning. You can incorporate reheated crab into various dishes such as pasta, rice, salads, or even sushi rolls. By reheating the crab, you can transform it into different meals, adding variety to your dining options.
In the following sections, we will explore different methods for reheating crab. These methods include steaming, air frying, microwaving, boiling, oven reheating, and grilling. Each method has its own advantages and can be chosen based on your preference and the equipment available to you. Whether you prefer the simplicity of the microwave or the smoky flavor of the grill, you will find a method that suits your needs.
Preserves flavor and texture
Preserving the flavor and texture of crab when reheating is essential to ensure a delicious meal. Whether you have leftovers from a seafood feast or you want to enjoy crab again the next day, applying the right reheating techniques will help maintain the taste and texture you love.
Crab meat is delicate and prone to becoming rubbery or dry if not reheated properly. Here are some tips to preserve the flavor and texture when reheating crab:
- Avoid overcooking: Overcooking crab can result in tough, chewy meat. It is important to heat the crab just until it is heated through to prevent overcooking.
- Use gentle cooking methods: Steaming, air frying, and oven reheating are all gentle techniques that help to retain moisture and prevent the crab from drying out.
- Use lower temperatures: When reheating crab, using lower temperatures for a longer duration can be beneficial. This allows the heat to distribute evenly and reduces the risk of overheating and drying out the meat.
- Cover the crab: When using methods like oven reheating or grilling, covering the crab with foil or a lid can help trap moisture and prevent it from escaping.
By following these steps, you can ensure that reheated crab maintains its succulence and deliciousness. The preserved flavor and texture will make your meal just as enjoyable as it was when freshly cooked.
Reduces food waste
Reheating crab not only allows you to enjoy a delicious meal, but it also helps reduce food waste. Crab is a delicate and expensive seafood that should not go to waste. By reheating leftover crab, you can extend its lifespan and avoid throwing it away unnecessarily.
When you reheat crab, you give it a second chance to be enjoyed while preserving its flavor and texture. Instead of letting it go to waste, reheating crab allows you to fully appreciate its delicate taste and unique texture.
Reducing food waste is crucial for a sustainable and responsible approach to cooking. By reheating crab, you make the most out of your ingredients, preventing them from ending up in the bin. This not only saves you money but also positively impacts the environment.
In addition to reducing food waste, reheating crab provides a convenient way to plan your meals. With reheated crab, you can easily incorporate it into various dishes, such as crab cakes, crab pasta, or crab salad, and create a versatile menu without any hassle.
Reheating crab also saves you time and effort in the kitchen. Instead of starting from scratch, you can simply reheat the crab and have a delicious meal ready in no time. This is especially beneficial for busy individuals or those who want a quick and easy meal without compromising on taste.
Saves time and effort
Saves time and effort are two key reasons why reheating crab can be a convenient option for busy individuals. When you have leftover crab, reheating it saves you the time and effort of preparing a new meal from scratch. Instead of spending hours in the kitchen, you can simply reheat the crab and enjoy a delicious meal in a fraction of the time.
Additionally, reheating crab allows you to make the most of your leftovers and reduce food waste. Instead of throwing away perfectly good crab, you can reheat it and enjoy it again. This not only saves you money but also helps to minimize your impact on the environment.
Reheating crab also offers versatility in your meal planning. By reheating crab, you can easily incorporate it into a variety of dishes and recipes. Whether you want to add it to a pasta dish, a salad, or a seafood chowder, reheating crab gives you the flexibility to create different meals with the same ingredient.
Overall, reheating crab is not only convenient but also an effective way to minimize food waste and maximize your time and effort in the kitchen. It allows you to enjoy a delicious meal without having to start from scratch, giving you more time for other activities and reducing your impact on the environment.
Allows for versatile meal planning
Allows for versatile meal planning:
One of the key benefits of reheating crab is that it allows for versatile meal planning. When you have leftover crab from a previous meal, reheating it gives you the opportunity to incorporate it into new dishes and recipes. Instead of simply eating the crab as it is, reheating it opens up a world of possibilities.
Here are a few ideas for how to incorporate reheated crab into your meal planning:
- Crab Cakes: Take the reheated crab meat and mix it with breadcrumbs, mayonnaise, mustard, and spices to create delicious crab cakes. You can then pan-fry or bake them to perfection.
- Creamy Pasta: Reheat the crab and toss it with al dente pasta in a creamy sauce made with butter, garlic, cream, and Parmesan cheese. Add some fresh herbs and a squeeze of lemon for added flavor.
- Crab Salad: Chill the reheated crab and use it as the star ingredient in a refreshing crab salad. Mix it with diced avocado, cherry tomatoes, red onion, and a tangy dressing for a light and satisfying meal.
By reheating crab, you can transform it into different dishes and adapt it to your meal planning needs. This allows you to enjoy the flavors and textures of crab in new and exciting ways, ensuring that you never get bored with your meals.

Methods for Reheating Crab
When it comes to enjoying a delicious meal, reheating crab can be a game-changer. Whether you have leftover crab from a previous feast or you want to make the most out of your fresh crab purchase, knowing the different methods for reheating crab is essential. Reheating crab not only preserves its flavor and texture but also reduces food waste, saves time and effort, and allows for versatile meal planning.
In the following sections, we will explore six different methods for reheating crab. Each method offers its own unique benefits and can be easily adapted to suit your preferences and available cooking equipment. Let's dive into these methods and discover how to make your crab taste just as delicious as the first time around.
- Steaming: Steaming is a classic method for reheating crab. It involves filling a pot with boiling water, placing the crab legs in a steamer basket, and steaming them for 4-6 minutes. Serve the hot crab legs with melted butter for a delightful treat.
- Air Frying: If you're a fan of crispy crab, air frying is the way to go. Preheat your air fryer to 400°F, place the crab legs in the air fryer basket, and air fry them for 5-7 minutes until heated through. Serve with your favorite dipping sauce for an extra kick of flavor.
- Microwaving: When you're short on time, microwaving is a convenient option. Simply place the crab legs on a microwave-safe plate, cover the plate with a damp paper towel, and microwave on high for 2-3 minutes. Remember to check the temperature and continue microwaving if needed.
- Boiling: Boiling is another quick and straightforward method. Bring a large pot of water to a boil, add the crab legs, and boil for 6-8 minutes. Once they're done, remove from the pot and serve hot.
- Oven Reheating: If you prefer a gentle and even reheating process, the oven is your best friend. Preheat your oven to 350°F, place the crab legs on a baking sheet, cover with foil, and bake for 10-12 minutes. Serve with lemon wedges and melted butter for a touch of freshness.
- Grilling: For all the grill enthusiasts out there, grilling crab legs can take the flavors to the next level. Preheat your grill to medium heat, brush the crab legs with melted butter or oil, grill for 4-5 minutes per side, and serve with grilled vegetables for a wholesome feast.
By now, you're equipped with the knowledge of various methods for reheating crab. Each method offers its own unique benefits and can be tailored to suit your preferences. Choose the method that best fits your needs and get ready to savor the deliciousness of reheated crab.
1. Steaming
Steaming is one of the most popular methods for reheating crab legs. It is a gentle and moist cooking technique that helps preserve the flavor and texture of the crab meat. Follow these steps to steam crab legs:
- Fill a pot with boiling water. Make sure the water level is not too high to avoid the water touching the crab legs.
- Place the crab legs in a steamer basket. This allows the steam to circulate around the crab legs evenly.
- Put the steamer basket in the pot and cover it with a lid. Make sure the lid fits tightly to trap the steam inside.
- Steam the crab legs for 4-6 minutes, or until they are heated through. The exact cooking time may vary depending on the size and thickness of the crab legs.
- Once the crab legs are steamed, carefully remove them from the pot using tongs or a slotted spoon. Be cautious, as the steam can be hot.
- Serve the crab legs hot with melted butter for dipping.
2. Air frying
Air frying is a great method for reheating crab legs as it helps to retain their natural flavors and textures while adding a crispy finish to the exterior. Here is a step-by-step guide on how to air fry crab legs:
- Preheat your air fryer to 400°F to ensure it reaches the desired temperature for reheating.
- Place the crab legs in the air fryer basket, ensuring they are spread out evenly to allow for even heating.
- Air fry the crab legs for 5-7 minutes, or until they are heated through and the meat is tender. This cooking time may vary depending on the thickness of the crab legs.
- Once the crab legs are reheated, serve them with a delicious dipping sauce, such as melted butter or a tangy aioli, to complement their rich flavor.
Air frying crab legs provides a quick and convenient way to enjoy this delectable seafood. The hot circulating air in the air fryer ensures that the crab legs are evenly heated, resulting in succulent and flavorful meat. The high temperature of the air fryer also helps to achieve a delightful crispiness on the outside, reminiscent of freshly cooked crab legs.
3. Microwaving
Microwaving is a quick and convenient method for reheating crab legs. Here's how to do it:
- Place the crab legs on a microwave-safe plate.
- Cover the plate with a damp paper towel to help retain moisture.
- Microwave the crab legs on high for 2-3 minutes.
- Check the temperature of the crab legs. If they are not heated through, continue microwaving in 1-minute increments until they reach the desired temperature.
Microwaving is a great option when you're short on time or don't want to use additional pots or pans. However, keep in mind that microwaving can sometimes result in uneven heating, so it's important to check and adjust the cooking time as needed.
4. Boiling
Boiling is another popular method for reheating crab, as it is quick and easy to do. Here is a step-by-step guide on how to properly boil crab legs:
- First, start by bringing a large pot of water to a rolling boil.
- Once the water is boiling, carefully add the crab legs to the pot.
- Allow the crab legs to boil for about 6-8 minutes. This will ensure that they heat all the way through.
- After the specified time, remove the crab legs from the pot using a pair of tongs or a slotted spoon.
- Place the boiled crab legs on a serving dish or plate.
Boiling the crab legs not only reheats them but also helps to lock in their natural flavors. The high temperature of boiling ensures that the crab legs are thoroughly heated, making them safe to consume.
Boiled crab legs can be enjoyed on their own or served with melted butter for dipping. They are a versatile option and can be incorporated into various dishes such as pasta, soups, or salads. If you're looking for a simple and fuss-free method to reheat your crab legs, boiling is a great option.
5. Oven reheating
Oven reheating is another excellent method to reheat crab legs and enjoy them just as deliciously as when they were first cooked. This method is particularly convenient if you have a large batch of crab legs to reheat and want to ensure even heating throughout.
To oven reheat crab legs, follow these easy steps:
- Preheat your oven to 350°F to ensure it's at the perfect temperature for reheating.
- Place the crab legs on a baking sheet, making sure to spread them out to promote even heating.
- Cover the crab legs with foil to prevent them from drying out during the reheating process.
- Bake the crab legs in the preheated oven for 10-12 minutes. This should be enough time for the legs to heat through and become tender once again.
- Once the crab legs are heated, remove them from the oven.
Now you're ready to serve your freshly reheated crab legs. Accompany them with lemon wedges and melted butter for an extra burst of flavor. You can also pair them with your favorite side dishes or serve them as part of a seafood feast. The oven reheating method ensures that your crab legs are evenly heated and retain their delicious flavor and texture, making them a perfect option for enjoying this delicacy again and again.
6. Grilling
Grilling crab legs is another great way to reheat them and add a smoky flavor to the meat. Here is a step-by-step guide on how to grill crab legs:
- Preheat your grill to medium heat. This will ensure that the crab legs cook evenly without burning.
- Brush the crab legs with melted butter or oil. This will help prevent them from sticking to the grill and add extra flavor.
- Grill the crab legs for about 4-5 minutes per side. This will allow them to heat through and develop beautiful grill marks.
- Once the crab legs are heated through and the meat is opaque, remove them from the grill.
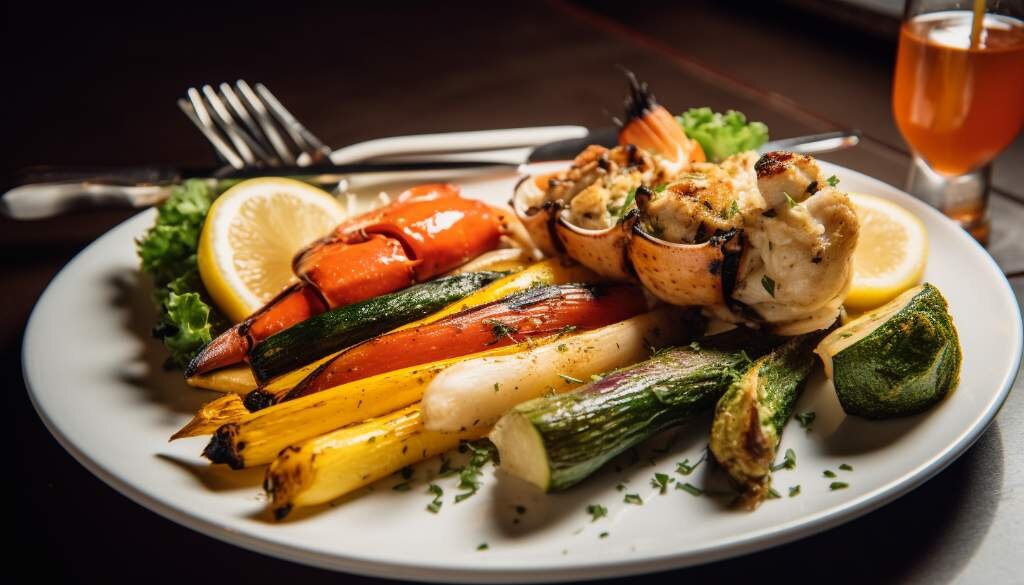
- Serve the grilled crab legs with some grilled vegetables for a complete meal.
Grilling the crab legs gives them a delicious smoky flavor and adds a nice char to the shells. It's a simple and quick method that can be done outdoors during the summer or using a stovetop grill pan indoors.
1. Steaming
Steaming is one of the most popular methods for reheating crab and it is also a great way to preserve the flavor and texture of the crab. By steaming crab legs, you can bring back the delicious taste and maintain their tenderness.
In the following sections, we will explore various methods of steaming crab legs, each with their own unique benefits and considerations. Whether you prefer to use a pot on the stovetop, an air fryer, a microwave, boiling water, oven reheating, or grilling, there's a method here that will work for you.
Fill a pot with boiling water
To properly steam crab legs, you will need a pot filled with boiling water. Steaming is a gentle method of reheating crab that helps preserve its flavor and texture. Here is how you can steam crab legs for a delicious meal:
- Fill a pot with boiling water: Start by bringing a pot of water to a vigorous boil. Make sure to use enough water to fully submerge the crab legs.
- Place crab legs in a steamer basket: Once the water is boiling, carefully place the crab legs in a steamer basket. The steamer basket should sit above the boiling water to allow the steam to cook the crab legs.
- Steam crab legs for 4-6 minutes: Cover the pot with a tight-fitting lid and let the crab legs steam for 4-6 minutes. The exact cooking time may vary depending on the size and thickness of the crab legs. You can check for doneness by gently inserting a fork into the thickest part of a leg. The meat should be hot throughout and easily come away from the shell.
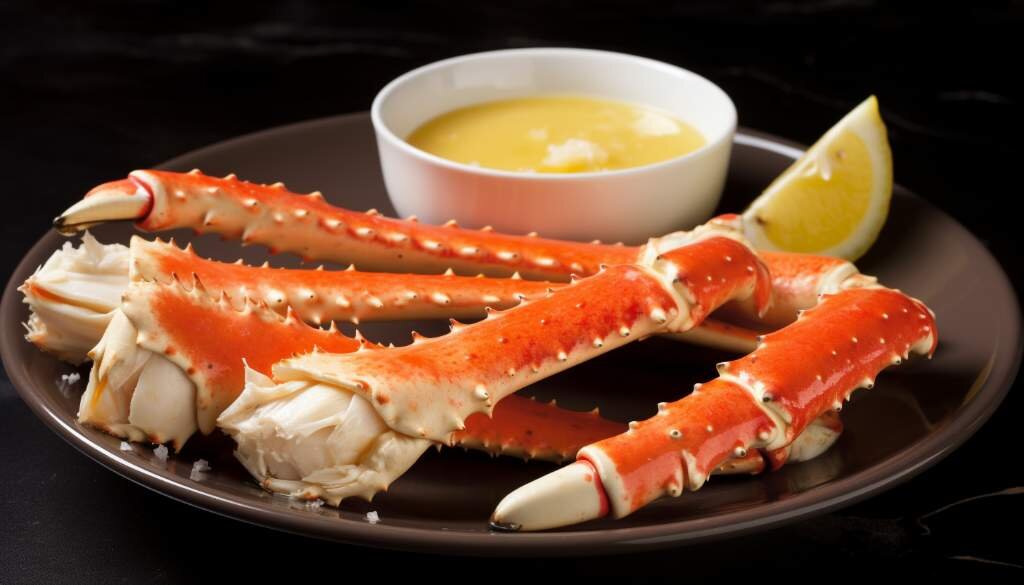
- Serve hot with melted butter: Once the crab legs are steamed to perfection, carefully remove the steamer basket from the pot. Serve the crab legs hot with a side of melted butter for dipping. The rich and creamy butter adds an extra layer of flavor to the moist and tender crab meat.
Steaming crab legs is a simple and effective method that helps retain their natural sweetness and delicate texture. It is an excellent way to reheat crab for a delicious meal. Enjoy!
Place crab legs in a steamer basket
When it comes to steaming crab legs, using a steamer basket is the key to achieving perfectly cooked and delicious crab meat. Here is how you can properly place crab legs in a steamer basket:1. Fill a pot with boiling water: Start by filling a pot with enough water to create steam. Bring the water to a boil over high heat.2. Prepare the steamer basket: While the water is boiling, make sure you have a steamer basket or insert that fits inside the pot. This will allow the crab legs to be elevated above the water and steam evenly.3. Place the crab legs in the steamer basket: Once the water is boiling, carefully place the crab legs in the steamer basket. Ensure that the legs are spread out evenly and not overcrowded. This will help the steam to circulate properly and cook each leg evenly.4. Steam the crab legs for 4-6 minutes: Place the steamer basket with the crab legs inside the pot. Cover the pot with a lid and let the crab legs steam for about 4-6 minutes. The exact cooking time may vary slightly depending on the size and thickness of the crab legs.5. Serve hot with melted butter: After steaming, carefully remove the steamer basket from the pot. Use tongs or a fork to transfer the crab legs to a serving dish. Serve them hot with some melted butter on the side for dipping.Steaming crab legs in a steamer basket is a simple yet effective method to reheat them while preserving their flavor and texture. The gentle steam ensures that the crab meat stays moist and tender, resulting in a delicious meal every time.
Steam crab legs for 4-6 minutes
Steaming is one of the most popular methods for reheating crab legs as it helps preserve their flavor and texture. Here is a detailed guide on how to steam crab legs for 4-6 minutes:
- Fill a pot with boiling water: Start by filling a large pot with enough water to submerge the crab legs. Bring the water to a boil over high heat.
- Place crab legs in a steamer basket: Once the water is boiling, carefully place the crab legs in a steamer basket. Make sure the crab legs are arranged in a single layer to ensure even heat distribution.
- Steam crab legs for 4-6 minutes: Gently lower the steamer basket into the pot, ensuring that the crab legs are not submerged in the water. Cover the pot with a lid to trap the steam. Steam the crab legs for 4-6 minutes, or until they are heated through.
- Serve hot with melted butter: Once the crab legs are heated, carefully remove them from the steamer basket. Serve them hot with melted butter for dipping.
Steaming crab legs not only ensures that they retain their delicious flavors but also helps maintain their tender and succulent texture. It is a quick and efficient method that allows you to enjoy restaurant-quality crab legs at home. So, the next time you have leftover crab legs, give steaming a try and savor the mouthwatering taste of reheated crab legs in just a few minutes.
Serve hot with melted butter
Steamed crab legs are a delicious and delicate seafood dish that can be enjoyed on its own or as part of a larger meal. Serving them hot with melted butter adds even more flavor to this already scrumptious dish. Here's how you can serve steamed crab legs with melted butter:
- Once you have steamed the crab legs according to the instructions mentioned earlier, remove them from the steamer basket and transfer them to a serving platter.
- In a small saucepan, melt a generous amount of butter over low heat. You can use salted or unsalted butter, depending on your preference. Allow the butter to melt completely until it becomes golden and fragrant.
- To enhance the flavor, you can also add some minced garlic or freshly chopped parsley to the melted butter. Stir them together to infuse the flavors.
- Pour the melted butter over the steamed crab legs, making sure to coat them evenly. The butter will not only enhance the taste of the crab legs but also add a luscious and velvety texture to each bite.
- Serve the crab legs hot with the melted butter on the side or drizzled over the top. You can also provide extra bowls of melted butter for dipping, as some people love to indulge in the velvety richness of butter with each crab leg.
- If desired, you can garnish the dish with a squeeze of fresh lemon juice or sprinkle some chopped parsley on top for added freshness and acidity.
Remember to use seafood crackers or crab crackers to crack open the crab legs and extract the succulent meat. Dip each piece of meat into the melted butter before taking a bite, and savor the combined flavors of the steamed crab legs and the rich, velvety butter.
By serving steamed crab legs with melted butter, you elevate the taste and add a luxurious touch to your meal. Whether you're enjoying them as an appetizer, a main course, or in a seafood feast, the combination of hot, steamed crab legs and melted butter is sure to please seafood lovers of all kinds.
2. Air Frying
Air frying is a popular method for reheating crab, providing a quick and efficient way to enjoy this delicious seafood. It involves using a kitchen appliance called an air fryer, which uses hot air circulation to cook food. Unlike deep frying, air frying requires little to no oil, making it a healthier alternative.
Preheat air fryer to 400°F
When it comes to reheating crab, air frying is a fantastic method that ensures delicious results. Air frying crab legs brings out their natural flavors and gives them a crispy texture. Here's how to preheat your air fryer to 400°F:
- Preheat your Air Fryer: Start by turning on your air fryer and setting the temperature to 400°F. It's important to preheat the air fryer so that the crab legs cook evenly and retain their juiciness.
- Set the Timer: Once your air fryer reaches the desired temperature, set the timer for 5-7 minutes. This cooking time may vary depending on the size and thickness of the crab legs.
- Prepare the Crab Legs: While the air fryer is preheating, you can prepare the crab legs. Make sure they are thawed if previously frozen. Rinse them under cold water and pat them dry with a paper towel. This step helps remove any excess moisture, ensuring that the crab legs become crispy when air fried.
- Arrange in the Air Fryer Basket: After prepping the crab legs, arrange them in a single layer in the air fryer basket. Be careful not to overcrowd the basket as it may affect the cooking process. If needed, you can cook them in batches.
- Cook in the Air Fryer: Once the crab legs are arranged in the basket, place it in the air fryer. Cook the crab legs for 5-7 minutes, or until they are heated through. The hot air circulating in the air fryer will give the crab legs a beautifully golden and crispy exterior.
- Serve and Enjoy: Once the cooking time is complete, carefully remove the basket from the air fryer. Transfer the hot crab legs to a serving plate and serve them with your favorite dipping sauce, such as melted butter or aioli. The air frying method preserves the natural flavor and texture of the crab legs, providing a delicious and hassle-free way to enjoy them.
Air frying crab legs at 400°F gives them a restaurant-quality finish without the need for deep frying or excessive oil. The result is succulent crab meat with a satisfying crunch. Keep in mind that cooking times may vary, so it's essential to check the crab legs for doneness and adjust the cooking time if necessary. Now you're ready to savor your reheated crab legs using the air frying method!
Place crab legs in the air fryer basket
When it comes to reheating crab legs, using an air fryer can be a quick and convenient method. Here's how to do it:
- Preheat the air fryer: Start by preheating your air fryer to 400°F. This will ensure that the crab legs cook evenly and thoroughly.
- Prepare the crab legs: While the air fryer is heating up, place the crab legs in the air fryer basket. Be sure to arrange them in a single layer, so they have enough space to cook properly.
- Air fry the crab legs: Once the air fryer is preheated, place the basket with the crab legs inside. Set the timer for 5-7 minutes and let them cook until they are heated through. The high heat of the air fryer will help to retain the moisture and preserve the flavor of the crab legs.
- Serve and enjoy: Once the crab legs are done, carefully remove them from the air fryer. Serve them with your favorite dipping sauce, such as melted butter or cocktail sauce, to enhance their flavor.
Using an air fryer to reheat crab legs is a great choice because it allows for quick and efficient cooking. The circulating hot air in the air fryer ensures that the legs are evenly heated, resulting in tender and flavorful crab meat. Plus, the air fryer's high heat helps to maintain the desired texture of the crab legs without drying them out.
Note: It's important to remember that cooking times may vary depending on the size and thickness of the crab legs. Keep an eye on them while they're cooking to avoid overcooking or undercooking. Adjust the cooking time accordingly if needed.
Now that you know how to place crab legs in the air fryer basket, you can enjoy perfectly reheated crab legs whenever you crave them. Whether it's for a quick weeknight dinner or a special occasion, the air fryer method offers a hassle-free way to enjoy delicious reheated crab legs.
Air fry for 5-7 minutes until heated through
Air frying is a fantastic method for reheating crab as it helps retain the delicious flavors and preserves the delicate texture of the crab meat. It's a quick and convenient way to enjoy a hot and flavorful meal. Here's how to air fry crab legs to perfection:
- Preheat your air fryer to 400°F to ensure the crab legs cook evenly and become crispy on the outside.
- Place the crab legs in the air fryer basket, making sure to leave space between them for proper air circulation.
- Air fry the crab legs for 5-7 minutes until they are heated through. The exact time may vary depending on the size and thickness of the crab legs, so keep a close eye on them to avoid overcooking.
- Once the crab legs are hot and ready, remove them from the air fryer and serve them immediately.
- For an extra burst of flavor, prepare a dipping sauce of your choice to accompany the crab legs. Classic options like melted butter or cocktail sauce work wonderfully.
Air frying not only ensures that your crab legs are heated evenly, but it also gives them a delightful crunch. It's a great method to use when you want a quick and hassle-free way to enjoy the deliciousness of reheated crab. Give it a try and savor the scrumptiousness of perfectly heated crab legs!
Serve with dipping sauce
When it comes to reheating crab using the air frying method, serving it with a delicious dipping sauce can enhance the flavors and make it even more enjoyable. The dipping sauce adds a tangy and savory element to the crab, providing a balance of flavors. Here are a few ideas for delicious dipping sauces to serve alongside your reheated crab:
- Garlic Butter Dip:
- Melt some butter in a saucepan over low heat.
- Add minced garlic and sauté until fragrant.
- Stir in a squeeze of lemon juice and some chopped parsley.
- Season with salt and pepper to taste.
- Serve the crab legs with this rich and buttery dip.
- Spicy Mayo Dip:
- In a small bowl, combine mayonnaise, Sriracha sauce, and a squeeze of lime juice.
- Adjust the amount of Sriracha according to your desired level of spiciness.
- Mix well until the sauce is smooth and creamy.
- This dip adds a kick of heat to the crab legs and complements their natural sweetness.
- Cocktail Sauce:
- In a bowl, combine ketchup, horseradish, Worcestershire sauce, and a dash of hot sauce.
- Stir well to combine all the ingredients evenly.
- Add a squeeze of lemon juice and mix again.
- The tangy and slightly spicy cocktail sauce pairs perfectly with the crab legs.
- Tartar Sauce:
- Mix mayonnaise, finely chopped pickles, capers, lemon juice, and a pinch of salt and pepper in a small bowl.
- Stir until all the ingredients are well combined.
- This creamy and tangy sauce adds a refreshing element to the crab legs.
- Garlic Aioli:
- In a blender or food processor, combine mayonnaise, minced garlic, lemon juice, and a pinch of salt.
- Blend until smooth and creamy.
- The garlic aioli brings a rich and garlicky flavor to the crab legs.
Feel free to experiment with different ingredients and flavors to create your own unique dipping sauce. The key is to find a sauce that complements the delicate taste of the reheated crab without overpowering it. Whether you prefer a buttery dip, a spicy kick, or a tangy sauce, serving your reheated crab with a dipping sauce will take your meal to the next level of deliciousness.
3. Microwaving
Microwaving is a convenient and quick method for reheating crab. It is ideal for those who want to enjoy their crab legs without spending too much time or effort in the kitchen. Microwaving allows for easy and efficient reheating, ensuring that your crab legs are heated through and ready to eat in just a few minutes.In this section, we will discuss the process of microwaving crab legs and provide you with some tips to ensure the best results. We will cover important information such as the appropriate plate to use, how to cover the crab legs while microwaving, and the recommended microwave settings.Before we dive into the details, it's important to note that microwaving may not be the best option for all types of crab dishes. For example, if you have a crab casserole or a crab soup, it's better to use alternative reheating methods like oven reheating or stovetop heating to preserve the texture and taste.In the upcoming sub-sections, we will guide you through the process of microwaving crab legs step-by-step to ensure that you achieve perfectly reheated crab. We will cover topics such as choosing the right plate for microwaving, covering the crab legs properly to retain moisture, and determining the appropriate cooking time based on the power of your microwave.So, let's get started and learn how to microwave crab legs to enjoy a delicious meal in no time!
Place crab legs on a microwave-safe plate
When it comes to reheating crab in the microwave, it is essential to start by placing the crab legs on a microwave-safe plate. This will ensure that the legs heat evenly and do not become soggy or overcooked. Here are the steps to follow:
- First, take a microwave-safe plate and place the crab legs on it. Make sure to arrange them in a single layer, without overlapping them. This will allow the microwave to heat them evenly.
- Next, cover the plate with a damp paper towel. The damp paper towel will help keep the crab legs moist and prevent them from drying out during the reheating process.
- Now, it's time to microwave the crab legs. Set the microwave to high heat and cook the legs for 2-3 minutes. The exact cooking time may vary depending on the wattage of your microwave, so it's important to keep an eye on them and check their temperature.
- Once the microwave timer goes off, carefully remove the plate from the microwave. Use oven mitts or a kitchen towel to handle the hot plate.
- Check the temperature of the crab legs using a meat thermometer. The internal temperature should reach 165°F (74°C) to ensure they are thoroughly heated and safe to eat.
- If the crab legs are not yet heated through, you can continue microwaving them in 30-second intervals until they reach the desired temperature.
- Finally, serve the reheated crab legs on a platter and enjoy them while they're still hot. You can serve them with melted butter or your favorite dipping sauce for added flavor.
By following these steps, you can easily and safely reheat crab legs in the microwave, preserving their delicious taste and tender texture.
Cover plate with a damp paper towel
When microwaving crab legs, it is important to cover the plate with a damp paper towel. This simple step helps to create a moist and steamy environment, preventing the crab legs from drying out and becoming tough.
Covering the plate with a damp paper towel helps to retain moisture during the reheating process. As the microwave heats up the crab legs, the damp paper towel creates steam, which helps to keep the meat succulent and flavorful. This moisture also helps to distribute heat evenly, ensuring that the crab legs heat through properly.
To cover the plate with a damp paper towel, simply wet a paper towel with water and wring out any excess moisture. Place the damp paper towel over the crab legs, making sure that it covers them completely. The paper towel should not be soaking wet, but rather slightly damp.
The damp paper towel acts as a barrier between the microwave and the crab legs, allowing for gentler and more even heating. It also helps to prevent the microwave from splattering and making a mess. Additionally, the paper towel helps to trap in the steam, which further enhances the flavor and texture of the reheated crab legs.
Remember to check the temperature of the crab legs after microwaving to ensure they are heated to your desired level of warmth. If needed, continue microwaving in short increments until the crab legs are heated thoroughly.
By covering the plate with a damp paper towel, you can enjoy perfectly reheated crab legs that are moist, tender, and full of flavor. Now you can confidently microwave your crab legs and savor their deliciousness without worrying about them drying out or becoming tough.
Microwave on high for 2-3 minutes
When it comes to reheating crab, the microwave can be a quick and convenient option. Here's how to do it in just 2-3 minutes:
- Place the crab legs on a microwave-safe plate.
- Cover the plate with a damp paper towel. This helps to retain moisture and prevent the crab legs from drying out.
- Microwave the crab legs on high power for 2-3 minutes. The exact time may vary depending on the microwave's wattage and the quantity of crab legs being reheated.
- After the initial cooking time, check the temperature of the crab legs. They should be heated through and piping hot.
- If necessary, continue microwaving in 1-minute intervals until the desired temperature is reached.
It's important to note that microwaving may not be the best choice for reheating crab legs if you want to preserve their texture and flavor. Microwaves can sometimes make the crab legs slightly rubbery. Nevertheless, this method is still convenient and can be used when you are short on time.
Once the crab legs are heated, serve them immediately with your favorite dipping sauce. It could be melted butter, lemon aioli, or cocktail sauce. The choice is yours. Enjoy your delicious reheated crab legs!
Check the temperature and continue microwaving if needed
When reheating crab in the microwave, it is important to check the temperature to ensure it is heated through. Microwaving times can vary depending on the power of your microwave and the size of the crab legs. Here are some steps to check the temperature and continue microwaving if needed:
- Place the crab legs on a microwave-safe plate.
- Cover the plate with a damp paper towel to help retain moisture.
- Microwave the crab legs on high for 2-3 minutes.
- Carefully remove the plate from the microwave and use a food thermometer to check the temperature. The internal temperature should reach 165°F (74°C) to ensure it is fully heated.
- If the crab legs have not reached the desired temperature, you can continue microwaving them in 30-second intervals, checking the temperature each time, until they are fully reheated.
It is important to be cautious when microwaving crab legs to prevent overheating, as this can result in rubbery or dried-out meat. By checking the temperature and reheating as needed, you can enjoy delicious and perfectly heated crab legs every time.
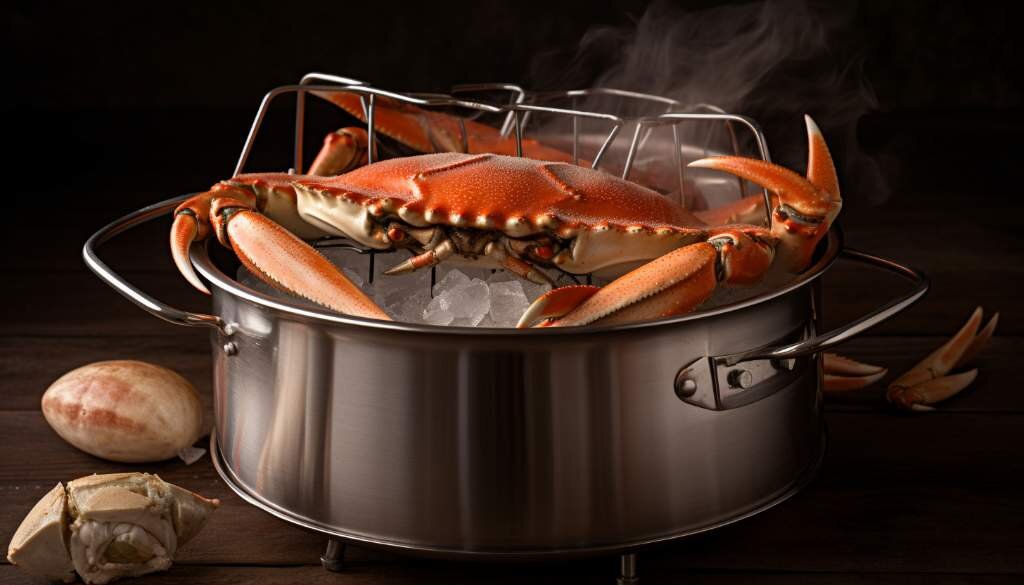
4. Boiling
Boiling is a popular method for reheating crab, as it allows the crab to heat evenly and retain its natural flavors. When you boil crab, you submerge it in boiling water for a specific duration to ensure it reaches the desired temperature. This method is relatively quick and easy, making it a convenient option for reheating crab.
In the following sub-sections, we will explore the steps involved in boiling crab for reheating. We will cover the duration needed for boiling, as well as the important considerations to ensure the crab is heated to perfection.
- Bring a large pot of water to a boil
- Add crab legs and boil for 6-8 minutes
- Remove from pot and serve hot
Boiling is a versatile method that can be used to reheat crab legs, crab claws, or even whole crabs. It is important to note that the boiling time may vary depending on the size and type of crab you are reheating. In the upcoming sub-sections, we will explore other methods for reheating crab, such as steaming, air frying, microwaving, oven reheating, and grilling. Each method offers its own unique benefits and considerations.
Whether you prefer the simplicity of boiling or want to explore other cooking methods, reheating crab allows you to enjoy a delicious meal without compromising its flavor and texture. By reheating crab, you can preserve its delicate taste and enjoy it just as if it were freshly cooked. Let's dive into the specific steps for each method in the following sub-sections.
Bring a large pot of water to a boil
To boil crab legs, you'll need a large pot of water and a few simple steps. Boiling is a quick and easy method that ensures your crab legs are cooked to perfection. Here's how you can bring a large pot of water to a boil for reheating crab legs:
- Fill a large pot with water: Start by filling a large pot with enough water to fully submerge the crab legs. Make sure the pot is large enough to accommodate the crab legs without overcrowding.
- Add salt (optional): Some people like to add salt to the water to enhance the taste of the crab legs. However, this step is optional, and you can skip it if desired.
- Bring the water to a boil: Place the pot on the stove over high heat and bring the water to a rolling boil. It usually takes about 10-15 minutes to reach a full boil, depending on the quantity of water and the heat intensity.
- Carefully add the crab legs: Once the water is boiling, carefully add the crab legs to the pot, ensuring they are fully submerged. Be cautious to avoid any splashing or splattering.
- Boil for 6-8 minutes: Allow the crab legs to boil for 6-8 minutes. This cooking time is generally sufficient to reheat the crab legs thoroughly and enhance their flavor.
- Remove the crab legs from the pot: Using tongs or a slotted spoon, carefully remove the crab legs from the boiling water. Be cautious as they will be hot.
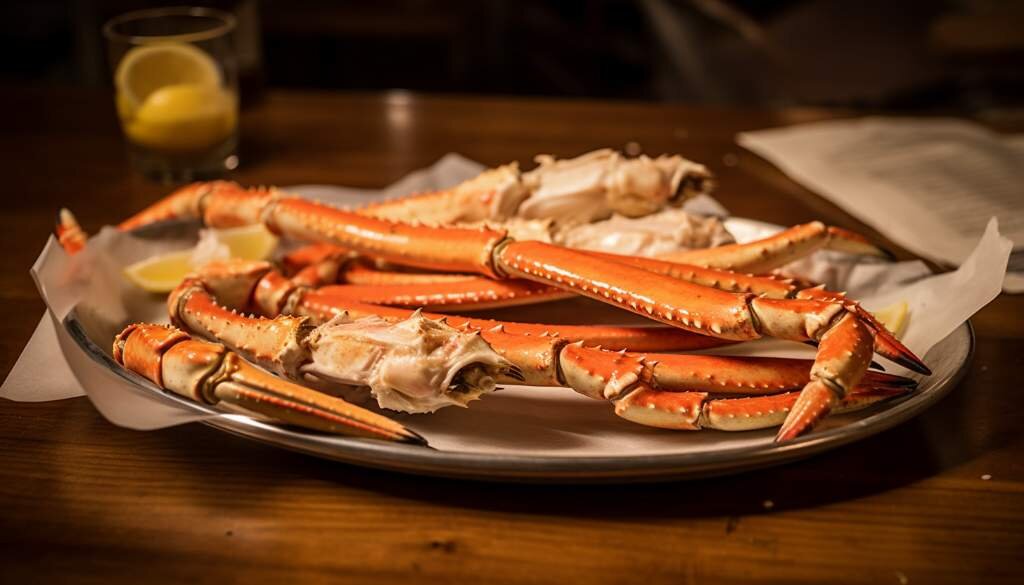
- Serve hot: Transfer the boiled crab legs to a serving plate or dish. You can serve them as is or with melted butter or lemon wedges for added flavor.
Boiling crab legs is a simple yet effective method that ensures the meat remains tender and flavorful. It is crucial not to overcook them, as this can result in rubbery and tough crab legs. By following these steps, you can confidently reheat your crab legs and enjoy a delicious meal.
Add crab legs and boil for 6-8 minutes
When boiling crab legs to reheat them, it is essential to follow the proper technique to ensure they are cooked thoroughly and safely. Here is a step-by-step guide on how to add crab legs and boil them for 6-8 minutes:
- Bring a large pot of water to a rolling boil. It is recommended to use a pot that is wide and deep enough to accommodate the crab legs without overcrowding.
- Once the water is boiling, carefully add the crab legs to the pot. Make sure to lower them gently to avoid splashing hot water.
- Let the crab legs boil for 6-8 minutes. This cooking time is sufficient to heat the crab legs all the way through without overcooking them.
- During the boiling process, keep an eye on the water level. If necessary, add more hot water to ensure the crab legs are fully submerged.
- After the allotted time, remove the crab legs from the pot using tongs or a slotted spoon. Place them on a platter or a lined baking sheet.
- Serve the crab legs while they are still hot. They can be enjoyed as is or with your favorite dipping sauces, such as melted butter, lemon juice, or cocktail sauce.
Boiling crab legs is a quick and straightforward method to reheat them. It allows the crab meat to retain its natural flavors and textures. Whether you are enjoying the crab legs on their own or incorporating them into a delicious meal, boiling is an excellent option. Remember, the cooking time may vary slightly depending on the size and thickness of the crab legs, so adjust accordingly. Enjoy your reheated crab legs!
Remove from pot and serve hot
Boiling crab legs is a simple and effective method for reheating them, ensuring that they are served hot and ready to enjoy. Once the crab legs have been boiling for 6-8 minutes, it's time to remove them from the pot and get ready to serve.
5. Oven Reheating
Oven reheating is one of the methods used to warm up crab for a delicious meal. It involves using an oven to heat the crab legs to the desired temperature. This method is great for preserving the flavor and texture of the crab, ensuring that it tastes just as good as when it was first cooked. In this section, we will explore the different steps and tips for oven reheating crab, so you can enjoy a tasty and satisfying meal. The following sub-sections will cover the preparation process, cooking time, and serving suggestions for oven reheating crab.
Preheat oven to 350°F
To reheat crab using the oven, follow these simple steps:
- Preheat your oven to 350°F. This temperature is ideal for gently warming up the crab without overcooking it.
- Place the crab legs on a baking sheet. Make sure they are arranged in a single layer to ensure even heating.
- Cover the crab legs with foil. This will help trap the heat and steam, keeping the meat moist and flavorful.
- Place the baking sheet with crab legs in the preheated oven. Allow the crab legs to heat for 10-12 minutes. The exact cooking time may vary depending on the size and thickness of the crab legs, so keep a close eye on them.
- Once the crab legs are heated through, remove them from the oven. Carefully remove the foil, as it may release hot steam. The crab meat should be hot and ready to enjoy.
- Serve the reheated crab legs with lemon wedges and melted butter for added flavor.
Using the oven to reheat crab is a great option because it allows for gentle heating while preserving the delicate flavor and texture of the crab meat. It's a convenient method that can be used for both pre-cooked crab legs or leftover crab from a previous meal. Now you can enjoy delicious, warm crab anytime you want without worrying about overcooking or losing its natural flavors.
Place crab legs on a baking sheet
When it comes to reheating crab legs in the oven, using a baking sheet is a simple and effective method. Here is a step-by-step guide to help you reheat crab legs on a baking sheet:
- Preheat the oven to 350°F: Start by preheating your oven to 350 degrees Fahrenheit. This temperature ensures even heating while preventing the crab legs from becoming overcooked.
- Prepare the crab legs: Place the crab legs on a baking sheet. Make sure to space them out evenly, allowing for proper airflow and even cooking.
- Cover with foil: Cover the baking sheet with aluminum foil. This helps to retain moisture and prevents the crab legs from drying out during the reheating process.
- Bake for 10-12 minutes: Transfer the baking sheet with the crab legs into the preheated oven. Allow them to bake for approximately 10-12 minutes. The exact cooking time may vary depending on the thickness of the crab legs and your desired level of warmth.
- Check for doneness: To ensure the crab legs are thoroughly reheated, check the internal temperature using a meat thermometer. The internal temperature should reach 145°F to ensure they are safe to consume.
- Serve and enjoy: Once the crab legs are heated through, remove them from the oven. Carefully transfer them to a serving platter or individual plates. Serve the crab legs hot with lemon wedges and melted butter for a delicious meal.
Reheating crab legs on a baking sheet is a convenient method that allows for even heating and minimal hands-on effort. It preserves the texture and flavor of the crab while ensuring it is thoroughly heated. So, next time you have leftover crab legs, try using this oven reheating method for a delightful meal.
Cover with foil and bake for 10-12 minutes
When it comes to reheating crab in the oven, covering it with foil and baking for 10-12 minutes is a simple and effective method. Here's how you can do it:
- Preheat your oven to 350°F (175°C). This temperature allows the crab legs to heat through without becoming overcooked or dry.
- Place the crab legs on a baking sheet. Make sure they are spread out in a single layer for even heating.
- Cover the crab legs with foil. This helps to trap the heat and moisture, preventing them from drying out during the reheating process.
- Bake the crab legs in the preheated oven for 10-12 minutes. The exact time may vary based on the size of the crab legs and your oven's performance. Keep an eye on them to avoid overcooking.
- After the allotted time, carefully remove the foil. Be cautious of the hot steam that might escape when uncovering the crab legs.
- Serve the reheated crab legs with lemon wedges and melted butter for a delicious meal. The foil baking method helps to retain the flavors and textures of the crab, ensuring a mouthwatering experience.
Remember, reheating crab is all about bringing it back to the desired temperature without overcooking it. This oven method with foil provides gentle and even heat distribution, resulting in evenly heated and flavorful crab legs for your delightful meal.
Serve with lemon wedges and melted butter
When reheating crab legs in the oven, serving them with lemon wedges and melted butter can enhance the flavor and provide a delicious accompaniment to the crab. Lemon wedges add a refreshing citrusy taste that complements the sweetness of the crab meat, while melted butter adds richness and indulgence. Here are some tips for serving crab with lemon wedges and melted butter when reheating them in the oven:
- Preparing the Lemon Wedges:
- Cut fresh lemons into wedges, ensuring that each wedge is of a manageable size for squeezing over the crab.
- Remove any seeds that may be present for convenience.
- Adding Melted Butter:
- Melt butter in a small saucepan over low heat or in a microwave-safe dish.
- Stir the butter occasionally to ensure even heating and prevent it from burning.
- Avoid overheating the butter, as it can change the flavor and consistency.
- Serving the Reheated Crab with Lemon Wedges and Melted Butter:
- Once the crab legs are reheated in the oven following the outlined method, carefully transfer them to a serving platter.
- Arrange the lemon wedges around the platter, making them easily accessible for squeezing.
- Pour the melted butter into a small dish or individual ramekins and place it alongside the crab.
- Encourage diners to squeeze lemon juice over their crab legs and dip the meat in the melted butter for added flavor.
The combination of lemon wedges and melted butter not only enhances the taste of the reheated crab legs but also adds a touch of freshness and richness. It's a classic and popular way to enjoy crab, and it complements the flavors of the crab meat beautifully. Whether you prefer a subtle citrusy tang or a rich and buttery indulgence, serving crab legs with lemon wedges and melted butter is a delightful addition to your meal.
6. Grilling
Grilling is a popular method of reheating crab that adds a delicious smoky flavor to the tender meat. Grilling is the process of cooking food directly over an open flame or heat source, typically an outdoor grill. It is a versatile cooking technique that allows for the caramelization of sugars in the crab, creating a crispy and flavorful outer layer.
In the following subsections, we will explore different aspects of grilling crab and provide you with helpful tips to achieve the best results. Let's dive into grilling crab and discover the mouthwatering possibilities it holds.
Preheat grill to medium heat
Grilling is a fantastic method for reheating crab, as it imparts a delicious smoky flavor while keeping the meat tender and juicy. To ensure the best results, it is important to preheat the grill to medium heat before placing the crab legs on it.
Preheating the grill is essential because it allows the grill grates to reach the optimal temperature, ensuring even heating and preventing the crab legs from sticking to the grates. Preheating to medium heat provides a good balance of heat intensity, allowing the crab legs to cook through without overcooking or drying out.
Once the grill is preheated to medium heat, it's time to prepare the crab legs. Start by brushing the crab legs with melted butter or oil. This helps to prevent them from sticking to the grill grates and adds a lovely richness to the flavor.
Carefully place the crab legs on the preheated grill. It's important to handle them with care to prevent them from breaking apart. Close the lid of the grill and let the crab legs cook for about 4-5 minutes per side. The exact cooking time may vary depending on the thickness of the crab legs, so it's important to keep a close eye on them and check for doneness.
When the crab legs are heated through and have developed a beautiful charred exterior, they are ready to be served. Be sure to use a pair of tongs to remove them from the grill to prevent any burns.
Grilled crab legs pair wonderfully with grilled vegetables, such as asparagus or corn on the cob. The smoky flavors complement the sweetness of the crab and create a delectable combination. Serve the grilled crab legs with a side of melted butter or a dipping sauce of your choice for added flavor.
Grilling crab legs not only reheats them but also infuses them with a delightful smoky flavor, taking your meal to the next level. It's a perfect option for cooking crab legs outdoors during the summer or whenever you crave that delicious grilled taste.
So, fire up your grill, preheat it to medium heat, and get ready to enjoy mouthwatering grilled crab legs. Your taste buds will thank you!
Brush crab legs with melted butter or oil
To enhance the flavor and add richness to grilled crab legs, brushing them with melted butter or oil is a crucial step. The melted butter or oil acts as a basting agent that helps prevent the crab legs from drying out during the grilling process. It also adds a touch of indulgence and richness to the already delicious crab meat. Here are some tips on how to properly brush crab legs with melted butter or oil for a mouthwatering grilled crab experience:
- Preparation is key: Make sure your melted butter or oil is ready before you start grilling the crab legs. Melted clarified butter is the preferred choice due to its high smoke point, but olive oil or other cooking oils work well too.
- Use a basting brush: A silicone basting brush is ideal for brushing the crab legs with melted butter or oil. It allows for even distribution and helps to coat every inch of the crab legs.
- Apply generously: Dip the basting brush into the melted butter or oil and generously brush it onto the crab legs. Ensure that the butter or oil reaches all the nooks and crannies of the shell and the exposed meat.
- Customize with seasonings: If desired, you can add additional flavors to the melted butter or oil. For example, you can mix in minced garlic, lemon zest, or your favorite herbs like parsley or thyme. This will infuse the crab legs with extra aromatic notes during grilling.
- Repeat during grilling: While grilling the crab legs, continue to brush them with melted butter or oil at regular intervals. This helps to keep the legs moist and enhances the flavor profile. Be careful not to overdo it, as you want to maintain a balance and avoid excessive greasiness.
- Serve with a final drizzle: Once the crab legs are grilled to perfection, you can give them a final touch of flavor by drizzling some melted butter or oil on top before serving. This adds a glossy sheen and amplifies the rich taste.
Remember, brushing crab legs with melted butter or oil is not only about taste but also helps to keep the crab meat moist and succulent during the grilling process. So, grab your basting brush and enjoy the deliciousness of grilled crab legs!
Grill for 4-5 minutes per side
Grilling is a fantastic method for reheating crab legs as it imparts a smoky flavor and adds a nice char to the shell. Here's how you can grill your crab legs for a delicious meal:- Preheat your grill to medium heat. The ideal temperature will allow for even cooking without burning the crab legs.- Brush the crab legs with melted butter or oil before placing them on the grill. This will help prevent sticking and add extra flavor.- Carefully place the crab legs on the grill grates, making sure they are secure and won't fall through. You can use a grill basket or foil to keep the legs together if needed.- Grill the crab legs for 4-5 minutes per side. This timing will allow the meat to heat through without becoming overcooked or rubbery.- While grilling, you can brush the crab legs with more melted butter or oil to keep them moist and enhance the flavor.- Once the crab legs are grilled to perfection, remove them from the grill and let them cool slightly before serving.Grilled crab legs pair wonderfully with grilled vegetables, such as asparagus or corn on the cob. The combination of smoky flavors from the grill will create a mouthwatering meal that your guests or family will love.
Serve with grilled vegetables
When it comes to serving crab with grilled vegetables, you are in for a delightful and healthy meal. Grilling the vegetables alongside the crab adds a smoky and charred flavor that complements the sweetness of the crab meat. Here are some tips and ideas to enhance your crab and vegetable grilling experience:
- Choose a variety of colorful vegetables to grill alongside the crab. Bell peppers, zucchini, eggplant, and asparagus are great options. Not only do they provide a visually appealing contrast to the crab, but they also offer different flavors and textures.
- Before grilling, make sure to preheat your grill to medium heat. This will ensure that the vegetables and crab cook evenly.
- Brush the vegetables with olive oil or your preferred marinade to enhance their flavor and prevent them from sticking to the grill.
- For the crab, brush it with melted butter or oil to keep it moist and add richness to the taste.
- Place the vegetables and crab directly on the grill grates. Be sure to turn the vegetables occasionally to ensure even cooking and prevent them from becoming too charred.
- Grill the vegetables until they are slightly tender and have beautiful grill marks. The exact grilling time will depend on the type and size of the vegetables. As a general guideline, it usually takes around 8-10 minutes.
- For the crab, grill it for about 4-5 minutes per side. Be careful not to overcook as it can make the meat tough and dry.
- Once everything is cooked, remove the vegetables and crab from the grill. Allow the crab to rest for a few minutes before serving to let the juices redistribute and enhance the tenderness.
- Serve the grilled crab with a medley of colorful grilled vegetables on the side. You can drizzle some lemon juice or sprinkle fresh herbs, such as parsley or cilantro, for added freshness.
- Enjoy your delicious and healthy grilled crab meal with a side of dipping sauces like garlic butter, aioli, or spicy mayo to complement the flavors.


